If you ever get stuck.
Sometimes it can happen that a certain hardware configuration causes problems. Please check this page first for a solution before contacting us.
Page Contents
How do I get mirr.OS onto the SD card?
Please read the tutorial how to flash mirr.OS to the SD card
I was able to set everything up, but I can’t get to the config interface
If the mirror can be set up normally, a mail comes, the display fits – but you can’t call the config interface: With Fritzboxes (and possibly also with other routers) you can switch on so-called client isolation.
This means that the devices in the network cannot communicate with each other; then, of course, you cannot access the mirror’s web server. In addition, some people deliberately connect IoT devices to the guest network, which often also has client isolation active and a different subnet than the main WLAN.
Conclusion: The devices do not “find” each other. Mirror must be in the same WLAN as the operating device and client isolation must be off (or an exception, but this is only possible with professional routers).
Importing a backup – this is how it works
You have exported your settings and want to import them again after a new installation?
No problem!
- flash mirr.OS to the card and turn on the power
- connect with the Pi
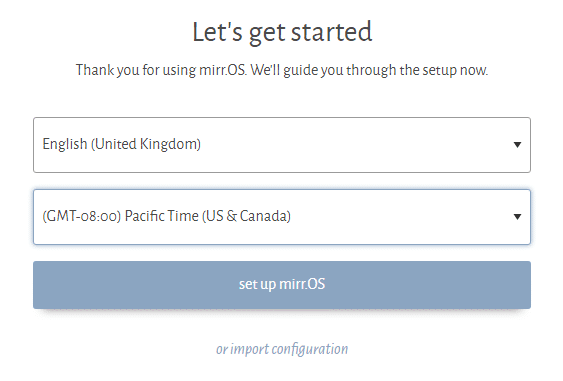
- at the first setup step (selection of the language) you will find the link “or import configuration” below the button to import your settings.
 Follow the instructions 🙂
mirr.OS does not find my WiFi
If you have problems to get your mirror on the net after the setup (mail sending fails, mirror resets after a few minutes …), please change the WiFi channel in your Fritz!Box or router. You can use any WiFi channel except 12 & 13.
Please operate the Pi only with the b/g/n (2.4GHz) WiFi! See also: WiFi problems with the Pi 3B
Start terminal (from v1.5 mirr.OS one)
For security reasons, the console is no longer available in the default configuration as of v1.5. Of course, you can activate it later.
If you need a console directly on the device:
- insert flashed SD card into the computer
- Partition
system-bootgets activated automatically - On there, find and open
cmdline.txt - Remove the word at the end of the line
nogettysave and exit - SD card into the Pi, now boots directly to the console (or if necessary after Ctrl+Alt+F1)
mirr.OS does not boot – display stays black
For mirr.OS <v1.10, please do not connect a LAN cable during initial boot. When you set up the Pi afterwards, you can specify that it should use LAN in the future.
Starting with v1.10 it is also possible to boot with the LAN cable plugged in.
My Smart Mirror keeps going on and off in setup
Your power supply probably does not have enough power. You need 2.5 amps. Also, many mini-USB cables are too “thin” and don’t let enough current through.
Where can I find the IP address of my smart mirror?
You can find it on your router under the list of connected devices. If you enter this IP address in the browser (with http:// in front of it) you will get to the backend and can configure your Smart Mirror.
How do I access my Smart Mirror via SSH?
For mirr.OS one
This is easily done by first finding out the IP address of your smart mirror at your router and then establishing a connection via a program on your computer.
macOS and many Linux distributions come with the application “Terminal” preinstalled (macOS: Applications > Utilities > Terminal, Ubuntu: View Applications > Terminal).
Windows 10: Since version 1809, OpenSSH is supplied directly for Windows PowerShell and the command prompt. So just search for the program “PowerShell” via the start menu and start it.
Older Windows versions: Terminus > Download button > Download and run the file terminus-<current version number>-portable.exe. Then select “SSH Connections” and create a new connection.
If you have worked with another mirr.OS image before, you probably have to change your known_hosts (delete the corresponding lines). Just google for it…
For mirr.OS one
ssh glancr@your.ip.address
User: glancr
Password: glancr!2018
I want to change the display orientation
For mirr.OS as of v1.10
Change display rotation from fresh 1.10 image (or if gadget snap was updated manually):
Run via SSH on the Pi. Important: Copy and paste command 1:1, including the final quote.
sudo snap set ubuntu-frame config="

wallpaper-top=0x000000

wallpaper-bottom=0x000000

display-layout=right

"
Depending on the desired orientation, change the value of display-layout=:
- normal: standard orientation of the screen, usually landscape.
- right: rotated 90° to the right (starting from standard orientation)
- inverted: landscape format upside down
- left: rotated 90° to the left
After that just leave the console. There is no need to reboot, but a reboot won’t hurt either.
For mirr.OS one < 1.10
Connect to your Pi via SSH. Via command
sudo snap set mir-kiosk display-layout=normal
you can change the alignment. Where display-layout can have the following values:
- normal = regular landscape format
- inverted = crosswise on the head
- right = 90° to the right (starting from the normal landscape format)
- left = 90° to the left (starting from the normal landscape format)
Then restart the Pi:sudo reboot
NOTICE: you rotate the output on the display – the admin area stays on portrait. All widgets that you move to the lower half of the board in the admin area will be output on the display in landscape mode on the right side of the screen.
Display shows “Connect to server (…)” at mirr.OS one
This display appears when the backend was not booted properly or not booted at all. This is not the rule and we would like to find out why and how this happened.
Thank you for helping us find and fix a bug now! The goal is,
- to read out the logs on the Pi,
- to write the logs to a file and
- to copy the file to a USB stick so that you can send it to us
Step-by-step instructions via the terminal/consolev
If there are several command lines, enter them line by line and press ENTER to send the command.
- save the service log to a txt file and places it in the home directory
sudo sh -c 'snap logs -n500 mirros-one.backend > backend-service.log' - open the file in an editor
less /home/glancr/backend-service.log - Is a lot of text displayed? Good! Close again with the “Q” key.
- now connect a USB stick – not NTFS formatted! FAT32. Wait briefly until it is registered. Check with the following command if the device “sda” is listed with the partition “sda1
lsblk - If yes, copy file to the stick
cd /home/glancr
sudo mkdir stick
sudo mount /dev/sda1 stick
sudo mv backend-service.log stick
sudo umount stick
- Now remove the stick, connect it to a PC and send us the file
Display shows “No Signal” or “No Source”.
When did this occur: when we connected 4K displays to the Pi.
If you see this on your display, but you are sure that there is NO hardware defect (display controller, HDMI cable, the Pi itself), then you can try to edit the config.txt on the Pi’s memory card.
For this:
- flash mirr.OS one to the SD card
- Insert the SD card into a card reader, call it on this computer and find the config.txt file in the root directory
- comment out the following settings (remove the # at the beginning of the line) and adjust values
hdmi_force_hotplug=1
config_hdmi_boost=7
hdmi_group=2
hdmi_mode=82
The details about the settings of the “Video Options” in the config.txt can be found here.
Wrong time: time is not correct
If the time or appointments are not displayed correctly or are offset by hours, the system time may have been set incorrectly. Please check the following steps to identify the source of the error:
- check if all time data run identically staggered (clock, date, calendar)
- if not, check if the entries in the calendar (e.g. Google Calendar) are set in the correct time zone
- look in the mirr.OS one system settings, which time zone is set there
- is the correct time shown on the display (clock widget)?
- if clock widget is correct, please go to clock widget settings and check if you have set time zone manually (check mark must be out)
- should the clock then not be correct, then there was an error when setting the system time
If so, please use the console and enter the following two commands:
sudo ls /etc/writable/localtime.tmp
If you get “no such file or directory”, the error is somewhere else. If the file exists, you have to delete it:
sudo rm /etc/writable/localtime.tmp
I want to customize the Raspi config file from mirr.OS one
Via SSH to the Pi
sudo editor /boot/uboot/config.txt
- Press the “i” key to activate the insert mode.Press the “i” key to activate the insert mode.
- Make changes
- Press ESC to exit insert mode
- Save and exit text editor with
:wq - Restart Pi:
sudo reboot
The text editor supplied by Ubuntu Core is called vi, instructions: https://www.fehcom.de/pub/viref.pdf
Error when flashing under Windows 10
According to user reports, current Windows 10 versions may have problems with built-in card readers. If Etcher reports errors when transferring the image file to the SD card or the Raspberry Pi does not boot correctly with the flashed card, please test if it works with an external USB card reader.
I bought the linked display controller but the image is not displayed correctly
If you see one half of the display mirrored and gray stripes appear in the middle, the LVDS settings of the controller are probably not correct. Go to the MENU via remote control. Enter 1147 and you will get to the factory menu. Under the first item General Settings you get to LVDS maps and you can test them from 0 to 15. The correct firmware is
HE315CF_B21_1920_1080_V59_031_2AV_CH_M90_KA03_
RW7KEY_SiR840_NF_AT_CPS_R137374_0xEE54_20141023_092208
I would like to change the appearance
You can change background color and font color in your settings.
My display shows nothing / I want to change the resolution
In mirr.OS one, the browser automatically adapts to the pixel dimensions of the display.
I want to include my Nextcloud/ownCloud calendar
We are working on full CalDAV support. Until then, you can also share the calendar via the public link and add it to the iCal data source. This works as follows (tested with Nextcloud 16.0.5 + Calendar app 1.7.1):
1) On the calendar view of your Nextcloud: click the share icon next to the desired calendar.
2) Check the “Share link” box
3) Call the web view for the calendar via the chain icon (opens a new window/tab).
4) At the top right there is a button “subscribe” → you can enter the linked address into the iCal data source, e.g. with right click > “copy link”. Now just swap webcal:// in the beginning of your copied URL with https:// and put it in your iCal-data source.
Problems with the Pi 3B+ and mirr.OS one
The problem with the Pi 3B+ is the driver of the WLAN chip. There are problems with the ac transmission standard (5GHz). Solution:
- change the transmission standard of your WLAN router to b/g/n
- or create an own WLAN for the Pi in your router with the transmission standard b/g/n
Display on/off via motion detector
We link you to the instructions of a user named “Felix” (many thanks for that). But we have also rebuilt it according to these instructions.
If you use other display controllers than the one recommended by us, you have to check again how the power supply of the display is regulated. But the procedure is identical.
Note: we can not assume liability if something is broken during the conversion!
Instructions Gadget Snap Update
Download links:
- Portrait: https://cloud.glancr-labs.de/s/o66JMH8qzc6wtFc/download
- Landscape: https://cloud.glancr-labs.de/s/w3oaZ7Q5xamo8Bq/download
- Download the appropriate gadget
- Download the file to the Pi via SSH / SFTP
- `snap install -dangerous <name-of-file>
With the snap-install command after --dangerous
press the tab key once, then the name of the file will be completed automatically.
Install mirr.OS on raspbian / RaspberryPi OS
We assume that you want to use the normal RaspberryPi OS (formerly Raspbian). Our ready-made mirr.OS image, which you can download from the website, also uses snaps.
If you have installed the mirr.OS-one-snap manually, you have to assign additional rights, e.g. to establish the WLAN connection.
It goes like this:
snap connections mirros-onegives you all interfaces that mirr.OS wants to access. Some are already automatically active, then there is something in the “Slot” column.- You have to activate the rest manually:
snap connect mirros-one:<name des slots> - Exceptions:
network-managerI don’t know if RaspberryPi OS uses NetworkManager. If not, you can install it beforehand withsnap install --channel=22/stable network-managerdbus-cogctlThis is the control for the browser that we provide on the finished image. You can omit it if you use the default browser of the Raspberry Pi OS.
Speaking of the browser: You need it for the screen output. Is your RaspberryPi OS the desktop version, i.e. with a graphical user interface? It should have a standard browser, with which you open the address http://localhost/display/ (the http:// in front of it is important, otherwise most browsers start a Google search).
If the mirr.OS snap is installed correctly, you will see the same display as in our finished image.
Depending on whether the standard browser has a full screen function, you can alternatively install our WPE snap:
snap install ubuntu-frame && snap install wpe-webkit-mir-kiosksnap connect mirros-one:dbus-cogctl wpe-webkit-mir-kiosk:dbus-cogctlFinally, restart:
sudo rebootI have developed a widget and would like to share it with the community
That’s very cool. Get in touch very quickly at contact@glancr.net with us!